


Shopping Cart

Noise coming from the floor above—footsteps, heels, moving chairs, jumping and children’s play—is among the most common causes of acoustic discomfort at home. Unlike airborne noise (voices or TV), the vibrations generated by people walking travel through the building structure: the floor slab, being the most elastic part, absorbs the stresses and transfers the sound energy both to the ceiling below and to the adjacent walls, in many cases the ideal solution would be to acoustically insulate the upper floor’s flooring, but this option is almost never feasible, per this reason the construction of an acoustic suspended ceiling often becomes the only way to reduce noise from above.
Structural vibrations. Impact noise is not just sound traveling through the air: it is a wave of energy that propagates through materials. If the building structure is lightweight, the walls transmit sound as much as the ceiling. Limiting the intervention to the ceiling while ignoring side walls will lead to unsatisfactory results.
False myths and wrong expectations. Believing that a suspended ceiling will cut noise by 50% or that a few sound-absorbing panels will eliminate noise are common mistakes. Sound-absorbing materials reduce reverberation but do not stop vibrations: you need heavy panels and decoupled systems.
Acoustic bridges and vibrations. Using rigid structures that connect the slab directly to the new suspended ceiling (for example metal hangers without rubber) creates “bridges” that transmit vibrations. To achieve good isolation, it is necessary to introduce elastic elements that break the mechanical continuity.
An effective intervention consists in building a suspended ceiling with a cavity, based on the mass-spring-mass principle. This system has three layers:
Mass: dense, heavy panels (e.g., plasterboard coupled with sound-insulating materials) fixed to the new framework. More mass means more inertia and therefore greater difficulty for sound to pass through.
Spring: an air gap and elastic components (anti-vibration hangers, hangers with rubber or spring) that decouple the suspended ceiling from the slab. This layer absorbs vibrations and prevents sound from transferring directly between the two elements.
Absorption: porous, fibrous materials inside the cavity (high-density rock wool, recycled polyester fibers, PET) that convert sound energy into heat.
Following these principles, the suspended ceiling can attenuate both impact noise and airborne noise coming from the upper floor.
Measure the available space. The suspended ceiling requires a certain clearance (at least 8–12 cm) to accommodate panels, profiles, and the air gap. Evaluate the minimum height you want to keep in the room.
Analyze the structure. Check the condition of the slab and verify that it can support the weight of the new suspended ceiling. If necessary, consult a technician to assess additional loads.
Identify the transmission paths. Before intervening, make sure the side walls are not the main source of disturbance, if they are, you will need to combine the ceiling work with wall insulation.
Apply perimeter profiles with elastic gaskets. Fix galvanized steel perimeter profiles to the walls, using decoupling bands or double-sided tape to reduce acoustic bridges. Make sure the profiles are level.
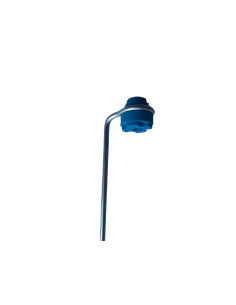
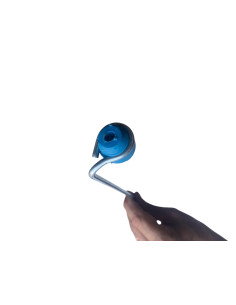
Install anti-vibration hangers. Hangers with rubber or a neoprene spring create an elastic element between the slab and the ceiling profiles, reducing vibrations and preserving the effectiveness of sound-absorbing materials. Stratifon offers steel hangers with anti-vibration rubber certified to CE-EN 13964, ideal for acoustic suspended ceilings.
Lay the primary profiles. Hook the primary and secondary profiles to the hangers, creating a regular grid (indicative spacing 40–50 cm). Check alignment with a level.
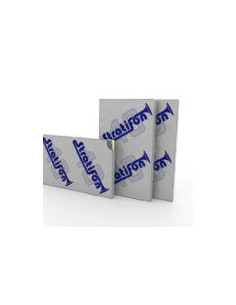
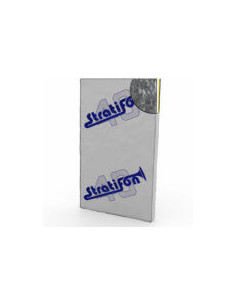
Select the right panel. For ceilings, Stratifon 40 is recommended, thanks to its 7 cm thickness and its layered composition of elastic materials, heavy membranes, and high-density glass wool.
Cutting and fastening. Cut Stratifon panels to the profile dimensions and fasten them using self-tapping screws or appropriate clips. If space is very limited, opt for Stratifon 29 (3.5 cm) coupled with a double layer of plasterboard.
Fill the cavity. Insert medium-high density sound-absorbing material (rock wool, polyester fibers, or recycled PET) in the space between the Stratifon panels and the slab, this improves attenuation at mid-high frequencies and reduces reverberation.
Seal the joints. Use polyurethane foam or elastic mastic to close joints between panels and around perimeters. Even small gaps can compromise isolation.
First board. Apply a special sound-insulating plasterboard (or high-density gypsum) to the profiles, leaving a gap of a few millimeters from the perimeter walls to insert sealant. Fix boards with screws on each profile.
Second board. Overlap a second board, staggering joints to avoid acoustic bridges and increase mass. This layering increases the structure’s inertia and improves isolation.
Jointing and finishing. Fill joints, apply joint tape, and an elastic perimeter sealant. Finally, skim and paint the ceiling.
Treat other transmission paths. Replace doors and windows with sound-insulating versions with double or triple glazing; seal drafts with airtight gaskets. Also pay attention to side walls and floors, using Stratifon panels or anti-vibration underlays where needed.
Avoid common mistakes. Do not rely only on sound-absorbing panels: by themselves they reduce echo but do not block noise. Do not insulate only the ceiling without considering side walls. Do not install rigid hangers: elastic components are essential to avoid acoustic bridges.
Professionals and safety. Consider hiring professionals experienced in acoustic insulation. A technician can verify structural loads and recommend the most suitable solution for your case.
The Stratifon 40 panel is designed to solve noise problems coming from above. With a thickness of 7 cm, it integrates mass, a heavy membrane, and an absorbing material in a single board. In a lining wall or suspended ceiling with a double plasterboard layer it achieves a certified reduction up to 61 dB, its self-supporting structure allows sound-blocking suspended ceilings up to 5 m without additional supports. Combined with anti-vibration hangers and specific profiles available on the Stratifon website, it provides a complete, high-performance system.
Insulating the ceiling from upper-floor noise requires an integrated approach that combines high-density panels, elastic elements, and absorbing materials. Choosing a mass-spring-mass suspended ceiling, using certified anti-vibration hangers, and panels such as Stratifon 40 ensures high acoustic reduction and greater living comfort. Before proceeding, assess the condition of the structure and also consider side walls and openings: only a complete intervention will restore the desired quiet
Comments (0)